The power goes out. The storm’s parked over your town for three days. Your electric stove is now a very expensive counter.
This is when the internet’s favourite graphic shows up: fifteen DIY stove combos, soda cans to beer kegs, all drawn like they’re equally easy. They’re not.
A thermos and a pot of boiling water is something your teenager can handle. A beer keg and an angle grinder is a job for someone who welds for a living. Both are on the same list, in the same cheerful font.
So here they are, sorted by who should actually be building them. Four levels. Start where you are, not where you wish you were.
One rule before any of it: every fire makes carbon monoxide. In a power outage, people die from cooking indoors, in garages, and in “just the doorway.” Every stove on this page lives outside. No exceptions, no matter how cold it is.

Level 1: Anyone, Today
No tools. No fire experience. Most of these you could set up in the next hour.
1. The Thermos Cooker
The verdict: The safest option on the list, and the most underrated.
Not really a stove. You boil water once, on whatever heat you’ve got, and the thermos does the rest. Preheat it with hot water, dump that, add your food and fresh boiling water, seal it, and walk away.
Oats overnight. Couscous and instant rice in under an hour. Red lentils given enough time.
What nobody mentions:
- Grains and dry foods only. Meat, dairy, or eggs sitting lukewarm for hours is a food-safety problem.
- A good wide-mouth food thermos matters. A cheap one loses heat fast.
- Fill it close to the top. Air space means heat loss.
Emergency fit: Excellent. It stretches every bit of fuel you have, and there’s no open flame sitting around.
2. The Cardboard Box Solar Oven
The verdict: Zero fuel, zero fire, and limited.
A box, foil reflectors, plastic wrap or glass on top, a dark pot inside. Point it at the sun.
It gets warm, not oven-hot. On a clear midday it’ll heat canned food, melt cheese, and warm leftovers. It won’t cook raw meat, and you shouldn’t ask it to.
What nobody mentions:
- A dark pot matters more than almost anything else.
- You’ll re-aim it every half hour or so.
- A cloudy day cancels dinner. It’s a backup to your backup.
Emergency fit: Good for summer outages. Useless in a winter storm.
3. The Tuna Can Buddy Burner
The verdict: Ugly, old-school, and a great thing to make before you need it.
Coil corrugated cardboard into a clean tuna can and pour melted wax over it. It burns steady for a long time and it’s hard to knock over.
What nobody mentions:
- Melt the wax in a double boiler, never straight on a burner. Hot wax catches fire.
- Make these now, while your kitchen works. That’s the whole point.
- It’s smoky and sooty. Your pot will be black.
- Put it out by smothering it with a lid or a can. Never water on a wax fire.
Emergency fit: Great for a kit. A few of these in a coffee can take up almost no room.
4. The Soda Can Alcohol Stove
The verdict: The best first stove to learn on.
Two aluminum cans, a pushpin, scissors, and denatured alcohol or yellow-bottle HEET. It weighs nothing and boils water.
What nobody mentions:
- The flame is nearly invisible in daylight. Assume it’s lit.
- Never refill it while it’s burning or still hot. This is the rule that matters.
- It needs a windscreen and a pot stand. The pot doesn’t sit on the can.
- Yellow HEET is methanol. Store it away from kids and anything drinkable.
Emergency fit: Very good for boiling water and pairing with the thermos. Keep a bottle of fuel with your emergency kit.
Level 2: Basic Tools and a Little Fire Sense
Tin snips, a shovel, some gloves. You should have built a campfire before, and you should know how you’ll put this one out before you light it.
5. The Coffee Can Wood Stove
The verdict: Burns sticks, which means you can’t run out of fuel.
A big steel coffee can, tin snips, a feed door at the bottom, vent holes at the top, pot on top.
What nobody mentions:
- Burn it once, empty and outdoors, before cooking on it. Labels, glue, and coatings need to burn off.
- Gloves when you cut. Cut tin edges are sharp and stay that way.
- A thin coat of dish soap on the outside of your pot makes the soot wash off.
- It needs constant feeding. You’re tending it the whole time.
Emergency fit: Strong, as long as you have dry sticks and fires are allowed.
6. The Cinder Block Grill
The verdict: Sturdy, simple, and holds a cast iron pan like it was made for it.
Concrete blocks stacked in a U, open end into the wind, a metal grate across the top.
What nobody mentions:
- Dry blocks only. Waterlogged blocks can crack or pop when they heat up.
- Keep the fire moderate. This isn’t a bonfire pit.
- Bare ground or gravel. Never on a lawn or a deck.
Emergency fit: Very good at home. The best “cook real meals for a family” option at this level.
7. The Dakota Fire Hole
The verdict: A real fire skill, and very fuel-efficient.
Two holes about a foot apart, one for fire and a smaller one upwind for air, connected by a tunnel at the bottom. The fire pulls air through, burns hot, uses less wood, and stays out of the wind.
What nobody mentions:
- Use a metal grate over the hole, not the flat rock in the graphic. Rocks, especially from rivers and creeks, can crack when heated.
- Only where digging and fires are allowed.
- Stay away from tree roots. They can smolder underground long after the fire looks out.
- When you’re done: drown it, stir it, drown it again, fill it in.
Emergency fit: Excellent in wind and when firewood is limited. Needs dry ground, so it’s not great after heavy rain.
8. The Flower Pot Stove
The verdict: Works, with more care than the graphic lets on.
Unglazed terracotta pots, stacked or propped on bolts, make a small, heat-holding cooker.
What nobody mentions:
- Terracotta holds moisture. Wet clay heated fast can crack or break apart. Use pots that have been dry indoors for a long time, and heat them up slowly.
- Unglazed only. You don’t know what’s in the glaze.
- Stand back when you first light it, and don’t lean over it.
Emergency fit: Fair. Useful if you already own the pots. Not worth buying them for.
Level 3: Real Tools, Real Skills
A chainsaw, metalworking tools, or protective gear, and the experience to use them. If you’re borrowing the tool to make this, it’s not your level yet.
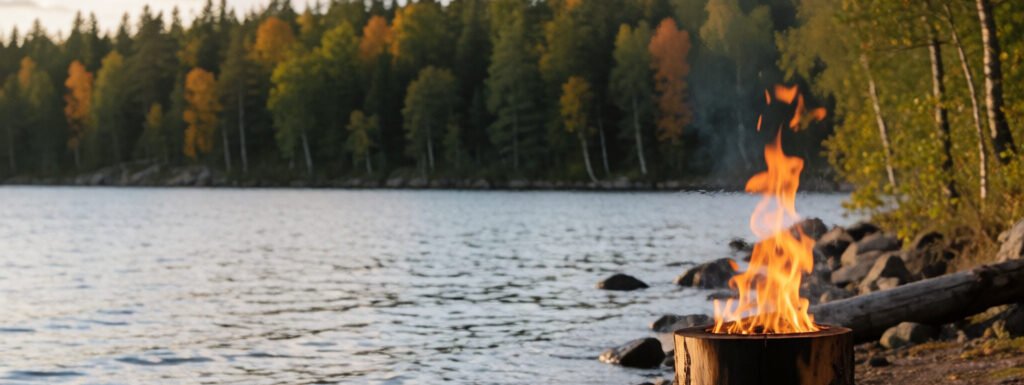
9. The Swedish Fire Torch
The verdict: One log, one evening of cooking, and it looks amazing.
A log cut lengthwise into quarters or eighths, stopping about three-quarters of the way down. Light it from the top center. The flat top holds a pot.
What nobody mentions:
- You need a chainsaw and you need to know how to use one. That’s the whole skill barrier. Pre-cut ones are sold if you don’t.
- Bare dirt or gravel only, well clear of anything flammable.
- Buy firewood near where you’ll burn it. Moving firewood spreads pests.
Emergency fit: Good, and it’s a smart thing to cut ahead of time and store dry.
10. The Stainless Drum Stove
The verdict: Great if you actually know what metal you’re holding.
The graphic calls it a “hobo stove”: a perforated metal drum (like a drying rack or cutlery drainer) with a tin can inside to burn sticks.
What nobody mentions:
- Bare stainless steel is fine. Chrome-plated, painted, or coated metal is not. Heat is a terrible way to find out which one you have.
- If you can’t tell the difference, this isn’t your stove yet.
- Many household racks are thin and warp under real heat.
Emergency fit: Decent, for people who know their metals.
11. The Umbrella and Mylar Solar Cooker
The verdict: Powerful, and that’s the problem.
A reflective parabola focuses sunlight onto a pot. Done well, it gets hot enough to actually cook.
What nobody mentions:
- A dish that focuses sunlight onto a pot also focuses it into your eyes. Use dark sunglasses or welding-shade eye protection while aiming it.
- Keep the focal point away from anything flammable, including dry grass, your sleeve, and curious kids.
- Wind turns an umbrella into a kite.
Emergency fit: Good in sunny, calm places. Needs someone who respects it.
12. The Car Rim Fire Pit
The verdict: Heavy, nearly indestructible, and a metalworking project.
A steel wheel rim becomes a fire ring and a heavy-duty cooking base.
What nobody mentions:
- Rims have paint, coatings, and sometimes residue. Burn them off first, hot and outdoors, well away from you, before any food goes near it.
- Steel rims only. Aluminum alloy rims are a different animal and not worth the risk.
- Getting a tire off a rim is its own job. Tire shops do it for a reason.
Emergency fit: Excellent once built. Build it ahead of time, not during the emergency.
13. The Ammo Can Stove
The verdict: A real wood stove, and a real fabrication job.
A steel ammo can with a flue pipe makes a compact, rugged wood stove.
What nobody mentions:
- Ammo cans are painted and sealed. Stripping the paint and burning the can out, outdoors, comes first.
- Cutting a clean flue opening and fitting the pipe takes metalworking tools and skill.
- A stove with a flue is not a license to bring it indoors. Indoor wood stoves need proper installation, clearances, and a CO detector. A DIY can isn’t that.
Emergency fit: Good outdoors if built by someone who knows what they’re doing.
Level 4: Trained Hands Only
These aren’t bad ideas. They’re bad ideas for amateurs. If you’ve got a welder or fabricator in the family, these are their projects, not yours.
14. The Steel Barrel Stove
The verdict: A serious heat source and serious cooking surface, built by someone who does this for a living.
A steel drum, cut and fitted, sometimes packed with sand for thermal mass, makes a big, long-burning stove.
What nobody mentions:
- Know exactly what the barrel held. Cutting or welding a drum that held fuel, solvents, or chemicals can explode, even when it looks empty. Vapors hang around. This is a known way fabricators get killed, and trained ones follow strict cleaning and purging steps before any cut.
- Food-grade or brand-new drums only, if you’re cooking on it.
- Burn it out fully outdoors before cooking, the same as any painted metal.
Emergency fit: Excellent for a homestead or long outage, built well in advance by someone qualified.
15. The Beer Keg Stove or Grill
The verdict: The best-built stove on this list, in the right hands.
Stainless steel, thick walls, and built to last forever. In a welder’s shop, a keg turns into a grill, a stove, or a brew kettle that’ll outlive everyone reading this.
What nobody mentions:
- Kegs are pressure vessels. Cutting into one that still holds pressure can turn the spear or the lid into a projectile. People trained in fabrication know to vent it completely and remove the spear before any cutting. People who aren’t trained shouldn’t be the ones figuring that out.
- Most kegs belong to a brewery and carry a deposit. Buy one that’s legally yours to cut.
- Cutting and grinding stainless throws sparks and dust. Full PPE, clear workspace.
Emergency fit: Outstanding, as a project done in a shop long before any emergency, by the welder in your life.
The One Rule for Every Level
No galvanized metal. Ever. Galvanized steel has a zinc coating, and heating it releases fumes that make people sick. If a bucket, pipe, or can has that dull, spangled gray finish, it stays away from fire. That goes for Level 1 through Level 4.
Before the Emergency, Not During It
- Pick your level honestly. Build one stove from your level now, while things are calm.
- Test it in the backyard. You don’t want to find out it doesn’t work by candlelight.
- Cook outside, always. Not in the garage, not in the doorway, not on a covered porch with the walls closed in. Get a battery-powered CO detector for inside the house.
- Store fuel safely. Alcohol, wax, and dry wood, away from kids and heat sources.
- Check burn bans. Even in an outage, fire restrictions may still apply.
- Know how you’ll put it out. Water, dirt, or a lid within reach before you light anything.
Your Turn
What level are you, honestly? And who’s the Level 4 person in your family you’d call first?